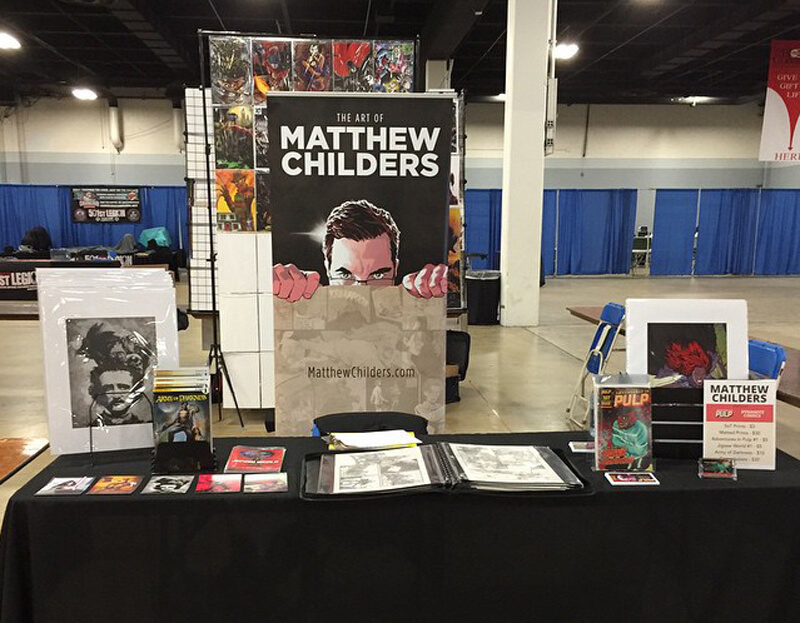
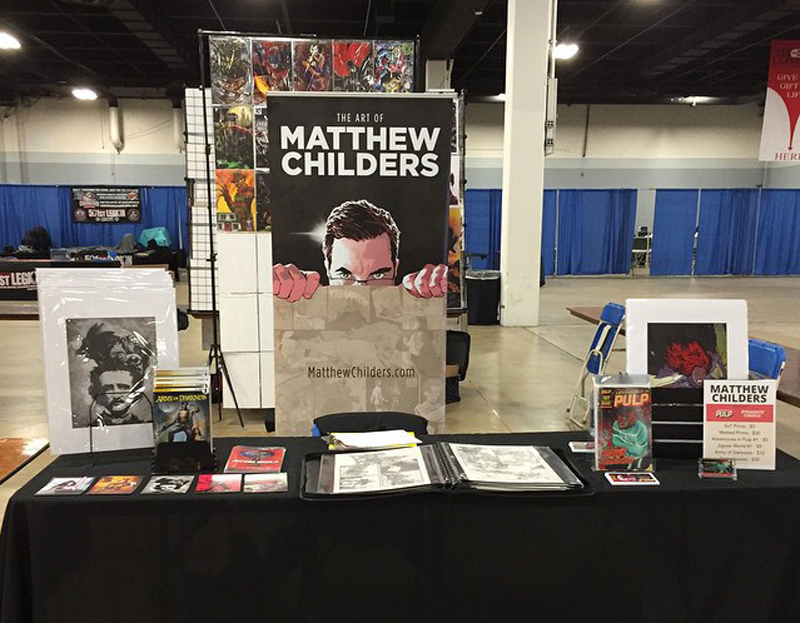
The biggest hurdle I have in keeping up with my website is figuring out what I want to say. I generally only just want to make new stories, but I know in this era of multi-media it’s important to have a voice, and considering I hadn’t posted in several months I wracked my brain to come up with a good topic. It just so happened that I was already thinking of things to prepare for convention season when several of my twitter friends were asking for tips on tabling at a convention and remembered how hard it was for me to find resources and information on con tabling. Now I don’t consider myself an expert table, but in the past few years I think I’ve got the basics down and thought it might be a handy resource for anyone new to the game.
So let’s start with the basic essentials.
The Table
Obviously you can’t table without one. To get a table at most cons you have to contact the con and generally pay a price. Depending on the convention, if you are not an established pro you will have to purchase a table in an Indie Alley. If you are an established pro you must provide proof or fill out a form to get a table in Artist Alley. But for the most part a table is a table and the price is a set fee depending on the size of the convention. Bigger conventions obviously charge a higher price for a table. For most beginners a standard table is typically anywhere from six feet to eight feet wide. Pay attention to the size of the table you purchase as you will need a nice Table Cloth to fit.
The Table Cloth
It seems fairly obvious, but when I first started tabling I forgot the table cloth and it drove me crazy trying to show off my work on a beat up table. And at some cons the tables are quite used. I see quite a few people new to cons who don’t follow this sage advice and it drives me insane FOR them. Don’t pay too much and buy fancy fitted table cloths unless you just have the money to burn. Plus the fitted ones sometimes won’t fit an odd size convention table. A simple 8ft table cloth is perfectly fine. I suggest black or a color that is fitting with your overall brand.
Where do you find them? You can find them on Amazon for less than $15.
The Banner
Banners have become pretty much industry standard. It helps people find you, and just know who you are. They look professional and are fairly inexpensive. They typically run $60-80 and can be used for a single convention up to two or three years depending on your need. I recommend planning for a two year use. Don’t design your banner with anything that would date the banner or make it product specific. For instance don’t title it after your comic. Title it after you or your studio. Something that will be around for a while. One of the best pieces of advice I’ve ever gotten was to sell yourself at a convention, not your book. So my banner has my name, not the name of my book. Also keep the info on your banner short and sweet. Your name and maybe your email or website is enough. Keep the important info at the top as the bottom two or three feet of the banner won’t be seen easily by the average con goer.
Where do you order them? I’ve gotten nice banners from BannerWorld.com and a great beginning banner would be their RE33.
Business Cards
Here is something I can’t stress enough. Always have business cards on hand. Even if someone comes to your table and doesn’t buy anything, many times they will stop buy and take a business card. Sometimes you will even find editors and publishers walking around discovering new talent. So that business card is essential. A couple hundred will serve you quite well for quite some time. I would also suggest searching Amazon.com for a nice business card holder or picking up one at Walmart or Target. Another option would be to print your info on book marks. Regardless having something with your info on it that people can take for free is always a great option.
Where do you order them? Business cards are not expensive and can be easily printed through a service like Vistaprint.

Comics
These days it is easier than ever to self-publish your own books. Large run printings will probably not be an option for most indie creators starting out, unless they have pulled off a successful kickstarter. The best option is finding a short-run printer and luckily Grekco Printing is there to help you out. They offer great prices for small print runs and are perfect for the beginner to mid-sized indie creator. They also put out a quality product that has won my praise time and time again. As far as pricing typically you are going to pay around $3-$3.50 per comic to have them printed. So you will probably have to charge $5 to make any sort of profit. Something to consider if you are an artist is printing a few of them with the cover title only and doing sketch covers for $20-$30. This gives the buyer something unique with added value.
Prints
There are so many printers that do prints, so you might want to do your research. Although I would again recommend Greko Printing as they also offer poster printing at 11×14 – 11×17 – and 12×18 sizes. Their gloss posters are on cover stock so they aren’t flimsy either. With prints I always try to make sure the paper stock is nice and thick. A UV coating is nice and helps protect and make your prints ultra glossy but can be very difficult to sign. An Aqueous Coating if possible can achieve a similar gloss but is easier to sign on. Average pricing for prints range from several cents to a dollar or two per print to produce, so consider charging $10-$20 for your prints depending on the quality. I tend to stick with the $10 price point as it gives you a healthy amount of profit and doesn’t hurt the pocket book of the customer either.
Pricing Signs
Making your pricing fairly large and easy to read is essential. And even when you do this, don’t be shocked when someone asks how much something is. I once had a 18×24 poster with prices large enough to see from across the room, and people still asked how much my prints and comics were. If you have enough time to plan, have your pricing poster printed at the same place you get your prints done if possible. If not Office Max prints nice size one-off prints for a very low price. I find they are perfect for printing pricing posters. Once printed spray mount your poster to some foam core and put it on an inexpensive easel. Make sure you take advantage of height when setting up your table.
Taking advantage of height/Setup
It’s extremely easy to lay your product flat on the table and call it a day. But this can kill sales immediately. Find ways of lifting your product up off the surface and up towards the viewers eye. The best way to do this is with inexpensive magazine stands like these on Amazon. No need to get fancy when you start out, but a simple stand like this will help make your stack of books look much more professional. The same goes for prints. If you have multiple prints consider the wire cube shelving system from Target. This is a staple at most conventions.
A sign up sheet
This is essential, and one of those things I didn’t do for a long time. But always keep a sign up sheet to get emails from curious customers. Even if they don’t buy anything, if they show interest get their email. This is a lead. Leads can turn into customers or contacts later on.
Bags
If you are selling prints consider buying some plastic poly-bags. Amazon or Uline.com are good recommendations. I’ve even found some at Hobby Lobby that were exceptional.
These are some of my basic beginner thoughts on setting up tabling at a convention. Don’t be afraid to think small the first time out, or even the first few times out. Every convention you attend, look around and see how other people are selling. Would that work for you? Ask questions and always be thinking of new ways to set up your table.
Also don’t forget to bring some strong tape (Gator or Duct Tape), snacks (as you can’t always get up from the table), a system of moving your equipment and product easily (a dolly or in my case a set of hand trucks), a friend or assistant if you have access to one, and if you plan on selling via credit card a Square Reader. You will lose at least 1/3 of your sales if you can’t take card. Especially in college towns or towns with youthful attendees.
Things that haven’t worked for me.
Matted Prints – Some people love getting matted prints. I tried matting some of my prints but literally failed to sell a single one. Although at the same convention the following year my table neighbor had nothing but small 3/4 frames of original art that sold like hotcakes. So if you want to try it, it’s an option. But for me it’s a no-go.
T-shirts – Some people make a killing off of t-shirts. But for me the price point on printing is not worth selling at cons. Especially for a beginner. Stay away from shirts unless you just have a great set-up to print them cheap.
Small prints – I sold quite a few small prints at one convention, unfortunately they sold so well and so cheaply my big prints didn’t sell at all. If all you sell are small prints, go for it.


